

[ad_1]
Recently, I had the chance to go hands-on with Elden Ring’s network test, which will be available to a greater group of players this upcoming weekend. If you elected to get into the test, I hope you get in. First and foremost, let’s get this out of the way – this text contains lots of information and lots and lots of spoilers. If you’re trying to play Elden Ring pure, this isn’t the article for you. That said, if you want to know a lot, lot more about how everything works from hours of hands-on play, this is the right place to be. Come on a journey with me through Elden Ring, starting right now. You can also check out an extensive New Gameplay Today featuring gameplay from the experience in video form here. I also want to state that my hands-on time with Elden Ring felt incredible, and I believe the full game will likely be a contender for 2022’s Game of the Year.
The Start of A Great Adventure
The journey begins at class selection, which will likely change/be modified for full release. There are many archetypes on display here, meeting many of the classic roles. As always, a class in this game amounts to starting gear and stats – you are free to take your character in any direction. I opt for a no-magic, no-frills master of melee with the Bloody Wolf. Magic is really quite robust in Elden Ring, even for characters that would typically not be casters for two reasons; one being that magic can summon spirits that can make daunting challenges much, much more manageable, and the other that the “Ash of War” system allows you to attach potent special effects to your various weapons. With an Ash of War, you can alter weapons to have different special abilities so that you can use a weapon of your liking, but with the inherent special move of another. More on both later. With a traditional large sword and set of starting armor, I’m off into the tutorial.
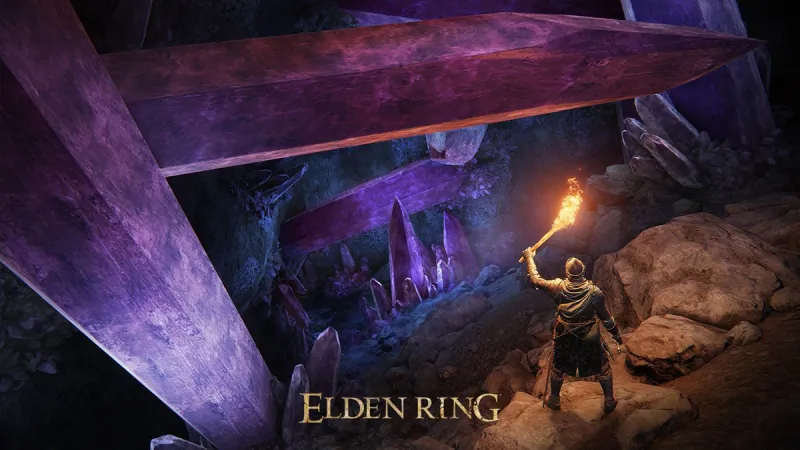
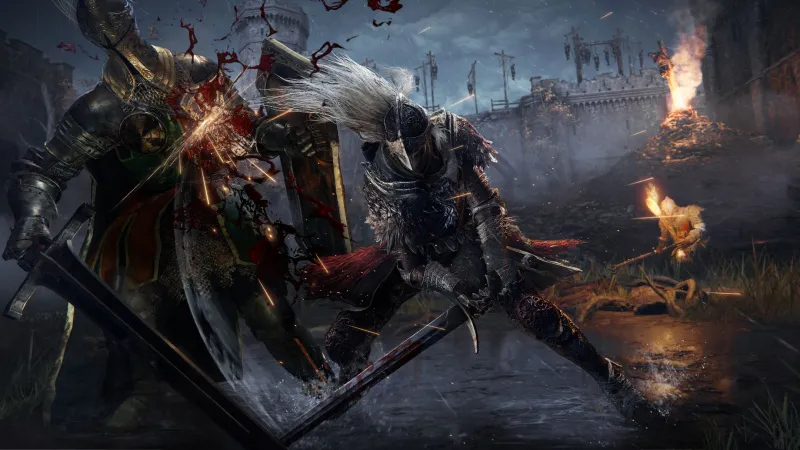
Combat, as expected, is very similar to the Souls series, specifically Dark Souls 3. Also as predicted, bits of Sekiro creep in, letting me stealth behind enemies silently and utilize grass to hide from foes, allowing me to bypass them completely or get in a powerful hit before combat even begins. The tutorial area, Fringefolk Hero’s Grave, is a very traditional FromSoftware tutorial zone, teaching the basics of combat in a zero-stress environment. Breaking tradition, the end boss of this area is just a basic knight with a boss health bar that isn’t any trouble to best at all. Interestingly enough, you can come back to this area much later through a back door in an extremely out-of-the-way beach area to discover a secret Ash of War, Gravitas. This allows you to shoot a point-blank area-of-effect purple blast that looks kind of like Final Fantasy’s Ultima spell. You can probably beat the boss in a few hits regardless of your spec and move out into the real world, but before that happens, you get your first lesson in flask allocation. Flask of Crimson Tears (health) and Flask of Cerulean Tears (mana) function identically to Estus flasks, and can be reallocated at any point of Grace (bonfire). In this network test, you have two of each kind of flask. Unlike Dark Souls 3, where I find myself going full health flasks if I’m playing any sort of melee build, I found that keeping a Cerulean flask around was quite helpful here, as mana comes in handy to use special attacks or summon spirits in rough situations.
Up the elevator and heading outside, we enter the ostensible first zone of the game, Limgrave. This network test kept us confined to Limgrave and the Stormveil Castle area, which is normal for a brief glimpse of the game. However, it was frustrating to see all kinds of awesome things on the map and in the distance and be blocked from going there by invisible walls. I made sure to push the limits on every border and try as many weird jump-offs as possible during the test, one of those led to finding the aforementioned backdoor to the Fringefolk Hero’s Grave. Anyway, the world outside the Grave is bright, beautiful, immediately intimidating, and wondrous in its scale and scope. Much has been said about the “compass” that connects the sites of grace and leads the player in some fashion toward the next crucial big dungeon and boss, but I assure you, it’s an open world through and through that begs for exploration. Attempting to head in a straight line through the game’s progression will likely prove incredibly challenging for most players, and there’s much to be missed via exploration.
Right next to this critical starting point are multiple things to see and do. A boss is riding a horse nearby that you absolutely do not want to mess with just yet. To the left is a statue up a hill that shoots a dull blue beam into the air when you interact with it, guiding you to a dungeon entrance. Small dungeons, caves, mines, gaols, and other encounters dot the landscape, and they are incredibly valuable to discover and complete. These range in size and scope – some underground passageways you discover may just have a piece of loot sitting in a chest, others will be several rooms with traps and dangerous creatures, and still others have multiple elevators and passageways. However, none of them are that long, and many end with a minor boss encounter. These bosses are much less difficult than what we’ll call progression and world bosses, and could even contain just a more powerful version of something you’re likely to encounter in the field.
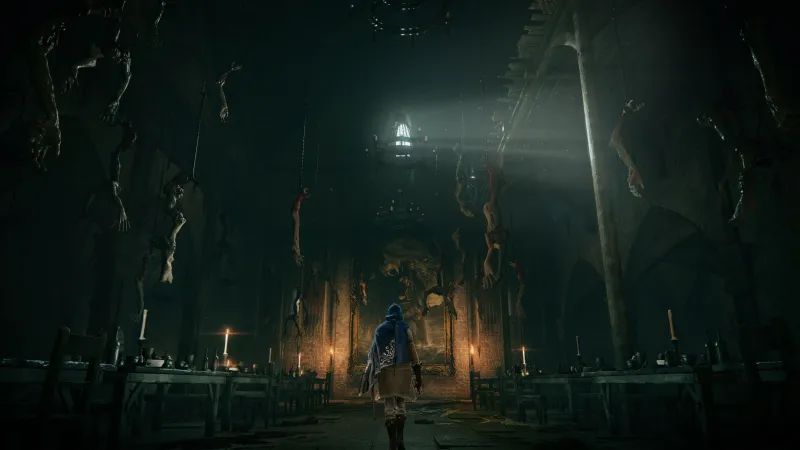
Of course, my priority was to follow the blue beam to see where it led. However, unbeknownst to me, this was probably a mistake. You see, very close to the starting point are the remains of a church that you’re going to want to check out before doing much of anything else. Here, we get a taste of familiar systems for Souls veterans. The “do-it-yourself” blacksmith is here, along with a critical merchant that sells many valuable introductory goods, spirit summons, crafting recipes, and more. The blacksmith here is structured the same as Souls titles, simply bring smithing stones and runes (souls) to it and upgrade your weapons. However, this hammer and forge that you handle yourself can only take your gear to +3. The game tells us that we’ll have to find a blacksmith somewhere else in the lands to bring our weaponry beyond that.
Spirit Summons And Crafting
The vendor is Kalé, and he is one of many nomadic vendors you meet on this journey. Yes, you can sell items to Kalé too. Kalé sells critical items, including a spirit summon for a magic-using friend, a spirit summon for a pack of three wolves, your first crafting books, and the torch. Before you even leave the first few screens, there are many systems new to Elden Ring from the Souls series. How does crafting work? It’s straightforward. Just pick up everything you see while adventuring, from flowers to fireflies, and you can craft yourself up all the consumables you need. While there have always been similar consumable items in Souls games, like one that enchants your weapon with fire for a short duration, you can now pick your favorites and ensure that you always have a healthy supply. Crafting is not the only way to find these items either, as they drop from enemies or can be found as usual in various environments. So it’s just apparently a way to keep your coffers flush with your most-used fare and encourages you to explore domains that might have your particular craft goods in them.
Spirit summons allow players to bring in a variety of summoned assistance on-demand, assuming they have the mana. While they cannot be used in every scenario or situation, (they can only be used while the “dungeon gate” icon exists on the lower-left corner of the screen when you are in range of a rebirth monument, so they are not allowed in every location) these permit a solo player to take on challenges that may feature numerous enemies or an extremely powerful adversary with few attack openings. In previous FromSoftware games, summoning in friends or random players to deal with a problematic boss was always an option if you got stuck – that option is still here, with a full multiplayer suite. But now, you can essentially have the equivalent of Souls NPC summons available for any encounter you see fit, whether that is a huge patrol of enemies you accidentally alert in the open world or a serious progression boss. Players looking for an extra edge against enemies can use spirit summons to even the odds.
Catacombs And Caves
But right, there’s that dungeon in the distance, remember? The blue light leads me to a door. This is the Stormfoot Catacombs, a mini-dungeon of sorts. Inside are a few gargoyle enemies that have a nasty habit of ambushing from above and some tricky flame traps that can incinerate an unwary adventurer in moments. However, I note that you can also use these traps against the enemies, something that continues to be valuable throughout this playthrough. Whether it’s leading enemies into traps that are meant for me or dragging them into the line of fire of bigger, more dangerous foes, it all works to the player’s advantage. A few levers, traps, and gargoyles later, we’ve opened up the main door of the dungeon and have access to the boss. Inside is the Burial Tree Watchdog, who can kill you fairly quickly with a strange combination of fire and a meticulous blade. Still, as I stated earlier, these small dungeon bosses are not on the same level as any traditional Soulsborne boss and are relatively easy to dispatch. This boss confers an Ash of War option when bested, and then we get a portal back to the start of the dungeon. This setup runs throughout all the caves, catacombs, and mines that we found in the network test. Gaols are a bit different, but we will get to those later.
I know what you’re thinking. You’re saying Dan, this sounds a lot like the Chalice Dungeons of Bloodborne, perhaps? You’re not entirely wrong, but these are smaller, easier to maneuver around, and distilled, if you will, down to the good stuff. These are about discovering the way in, finding stuff, fighting bosses, grabbing loot, and getting out, all with an additional checkpoint for your map. Filling out your map is incredibly satisfying, as is exploring every nook and cranny for these mini-dungeons. I was always compelled to explore even further, but sadly the network test greatly limits where you can go – but it did make me even more excited for the final release, where all of this can be explored entirely unfettered. I cannot wait to simply go all over the place before following the “canonical” path.
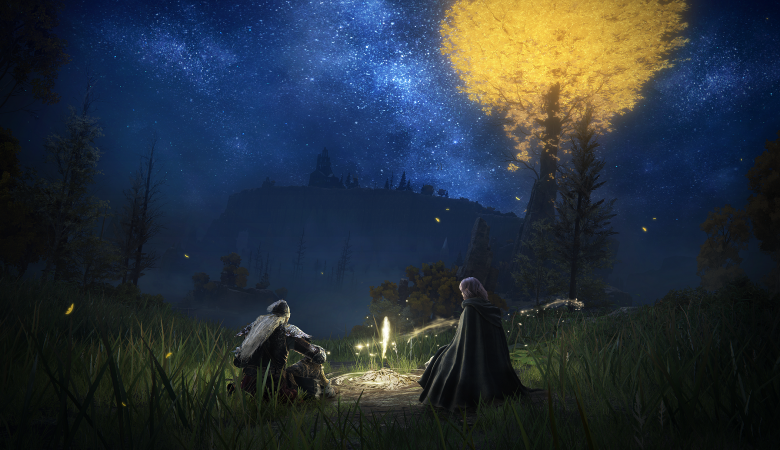
Torrent, The Spectral Steed
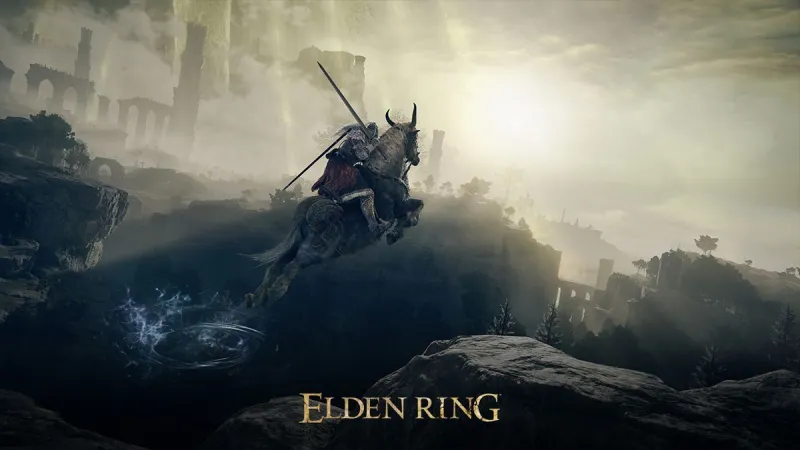
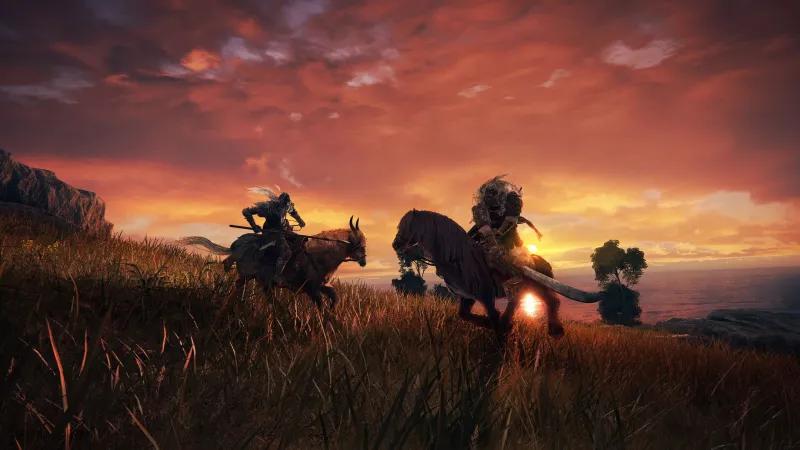
You can teleport to any point of Grace you have discovered at no cost from the map, making fast travel across the world quick and painless. Right now, we head to the next point and discover something big. It’s Melina, who fills in as this game’s Maiden in Black/Emerald Herald/Firekeeper, allowing us to spend our runes to level up. Yes, this is the same as spending souls to level up. Yes, you drop your runes when you die and need to go get them back. Yes, this game is a lot like a Souls game in an open world environment… and that’s awesome. Melina also gives us something very important on this first interaction, a spectral steed that we can use to travel the world. The mount’s name is Torrent, and it is incredibly useful for moving around quickly, grabbing your runes back from an open-world mishap, or even combat. While I found combat on the horse incredibly unwieldy at first, after a bit of learning the new timing on attacks and the positioning, it became a great asset to have available for world encounters, including the network test’s overworld boss. Torrent can be killed, and if you want to bring it back to life in the field, you’ll need to use one Flask of Crimson Tears. For clarification, no, this doesn’t deplete the flask forever, and it refills as normal at the next point of grace you rest at. Naturally, you can’t use Torrent in any kind of interior area or areas designated as major dungeons.
With Torrent, I begin to explore the nearby camp, the Gatefront Ruins. This place is a great example of how a mount and spirit summons let FromSoftware make a much more dangerous area completely packed with enemies, featuring a variety of armored knights and a praetorian leader. If an enemy spots you and blows a horn, they’ll alert the entire camp, and survival might be difficult. However, you can get away with Torrent’s speed or drag them to the edge of the camp and try to make a stand with spirit summoned allies. Torrent can also be used at “jump points” found around the map to get yourself out of sunken places or shoot yourself high up into an unreachable area. There’s a bunch of loot to find here in the camp, but the most important item by far is located under a glowing stele that’s hard to miss. This is a map fragment, and it populates your world map with illustrations, from roads to alcoves to other weird things that invite the player to saddle up and go check them out to determine what they are.
While exploring without the map is excellent, knowing what an area might look like is incredibly helpful. This knowledge may or may not directly lead you to find what you may have overlooked before – but it’s rarely as explicit as “you should go here” with what it offers. Instead, it’s a useful tool to help guide your explorative pursuits. Before I pull up the map to determine my next course of action, I notice something in the distance. It’s a telescope! The Birdseye Telescopes are located worldwide and they let you get a top-level view of a huge area. The telescopes allow you to zoom in and out for even more precise control, and you’re probably going to find something interesting if you spend time peering into them. In this case, I choose not to investigate anything I see in the telescope or on the map for now because on the way to the Gatefront Ruins, I spotted a cave off in a cliffside to check out before moving on.
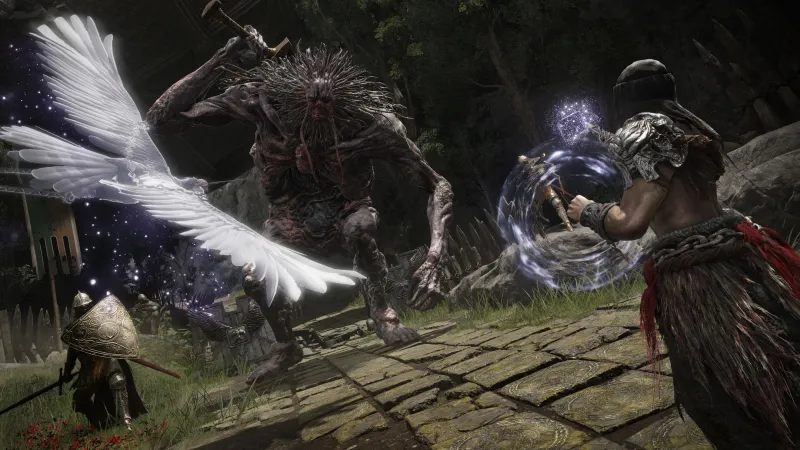
Aptly titled the Groveside Cave, this area doesn’t contain any soldiers or gargoyles. Instead, it’s full of wolves! There are a bunch of cave-specific craftable items to snag here, like cave moss and a ton of bugs to catch in a watery corner. This cave is smaller than a catacombs-style mini-dungeon, with no traps or switches to worry about, just a short route leading to a boss room. Inside, we find the Beastman of Farum Azula. While the Beastman hits like a truck if he connects, he’s not really an issue to get by, especially since I decided to try out my “three wolf” spirit summon. While the wolves aren’t strong, they distract the Beastman long enough for me to lay into him with jump attacks. In Elden Ring, when you really want to stagger an opponent, heavy hits and jump attacks are the way to go. Mastering a jump attack in my Souls brain took a while, but once you get the hang of it, it feels really great to cleave into someone with a massive two-handed jump swing. It’s as easy as hitting the attack button when you’re in the air, but it is something new to learn. It turns out exploring this cave was a brilliant choice, as besting the boss gives us something completely new to the FromSoftware action suite – the Flask of Wondrous Physick.
The Flask of Wondrous Physick
Now, we all know how Estus flasks work by this point. Health and mana potions that you can refill at any checkpoint, right? The Flask of Wondrous Physick is the answer to having a replenishable, customizable consumable to go along with these existing flasks. The Flask of Wondrous Physick refills at any checkpoint and is modular – you can mix different crystal tears into it to create a blend that works for your playstyle. In the demo, I found three different types of tears. One replenished mana, one buffed stamina, and one made the flask explode violently. You can mix two tears into the flask at once to create different effects, and I would imagine the full selection of tears in the main game is immense. I also wouldn’t be surprised to see us acquiring more flasks throughout the playthrough for multiple quaffs per checkpoint or the ability to mix more tears into them.
Big Problems, Big Solutions
At this point, I’m eager to pull open the map and start looking around for areas of interest, but yet again, I am pleasantly distracted by a huge caravan coming down the road. This immense road gang consists of a horseman on point, two enormous trolls hauling the cargo, and tons and tons of troops in tow, probably twenty or more assorted commoner and knight adversaries. Naturally, I’m not leaving without the loot.
Another player may have picked off different elements of the entourage piece by piece, but I decided that life isn’t worth living without a bit of risk. So I took out the horseman first, as I figured his speed and high attack damage would make a direct assault challenging, plus he might alert the horde. After that quick battle, I tried to jump on the back of the cart and loot the chest. No dice, can’t loot it while the caravan is in motion. So how do I stop this thing from moving? Do I actually have to fight two trolls on an open road while twenty assorted lesser villains come running after me? I was willing to attempt this just to see how it played out, but luckily, just whacking one of the trolls with my sword makes them stop hauling the cargo for a moment as they looked around for me. Zipping behind them on Torrent, I quickly jumped back on the back of the cart, looted its contents, and got away without having to take on the entire army. Big win! What was in the chest? A full set of Crucible Armor and an Ordovis’ Greatsword, gear that would become my mainstay for the entirety of the network test. The armor is quite heavy, so you’ll need some points in strength to be able to wear it effectively without losing all your mobility. The sword comes with its own special Ash of War skill, Ordovis’ Vortex, which is excellent at annihilating multiple enemies with a big attack with more range than you normally have with a big sword. Again, having mana available for these skills even if you’re eschewing shooting magic spells is a serious boon in combat, especially against bosses or larger enemies.
My adventure next takes me to a cliff’s precipice with suspiciously large blocks leading down. If you’ve ever played a FromSoftware game, you’re familiar with the “jump down carefully from object to object” scenario. The inclusion of a jump button makes navigating this exercise much easier than in previous titles. At the bottom is another catacomb to explore, the Murkwater Catacombs. While the first catacombs we explored had fire pillars that shot immense blasts of fire, this one features trigger traps on the floor that shoot out fire arrows. As in the first instance, I used these traps against the gargoyle denizens to avoid having to fight them on even terms. A quick lever pull opens the boss door, but some important loot was discovered on the way – The Northern Mercenary Ashes, a spirit summon that calls up a burly barbarian type. However, to my dismay, my mana pool wasn’t big enough to summon this one with my starter stats on the Bloody Wolf. During my next level up, I placed one point in the Mind stat in order to increase my mana pool so that I could try this spirit out. Spoiler: He’s tough and great to have around, much more hearty than the wolves, and an excellent distraction. The boss of these catacombs is the Grave Warden, a sort of gladiator type that conferred the Ash of War for Storm Blade when slain. Yes, the effect of this Ash of War when equipped is kind of like what you do with the Storm Ruler in Demon’s Souls or Dark Souls 3, so that’s pretty cool!
Mines And Gaols
Finally, it’s time to check out a location on the map. An obvious dark doorway hewn into the side of a mountain seems like a great place to check out, so I make my way to the Limgrave Tunnels, a mine-style mini-dungeon. This is the only one of these I found in the demo, but I assume that other mines will share some of the characteristics – minerals dot the walls and can be collected for crafting, and there’s a chance to find smithing stones among the rubble. Elevators run throughout the space, and there are multiple signature FromSoftware “elevator jumps” to be found here, where the player can find hidden items by jumping off of an elevator at various points during its ascent or descent. At the bottom, a boss awaits – the Stonedigger Troll. Similar to the trolls outside in many respects, this boss reminds me of The Last Giant from Dark Souls 2, but a bit more spry. As with other encounters, while using a melee-focused build, I found the jump attack to be extremely useful here. Upon defeat, the Stonedigger Troll bequeaths the Dragonscale Blade.
The map came in handy for the next exploration impetus as well. A giant circle of stone rocks seemed like an obvious choice to head to for a peek, so I headed up a stormy hill. Here in the upper parts of Limgrave, the world is under a constant deluge of storms, ranging from mild winds and drizzles to massive gusts and lightning, sometimes strong enough to significantly impede vision. The weather effects look fantastic, and I can’t wait to see what other areas of the game get other interesting nuances. There is a day/night cycle as well, and while I tried to fool around with it (You can rest at any site of grace to set the time of day to your liking) to see if I could make anything interesting happen, I didn’t notice anything different during the cycles outside of how the world looked.
This circle of stones was alone by itself, with strange rock creatures milling about it. They never seemed to fight back when I smacked them around and offered few runes, so I wonder if their role was something of a jailkeeper to the contents of the Gaol. This Gaol is known as Forlorn Hound Evergaol, and simply walking into the center of it and accepting the prompt teleports you to a boss arena. Bloodhound Knight Darriwil is a fearsome opponent in terms of mini-dungeon fare and is far more aggressive than other bosses faced until this point. While Darriwil’s HP pool is small, he can easily combo you into oblivion, so you may have to take a bit more care with it than other dungeon fights. In addition, this battle occurs out of range of a rebirth monument, meaning you can’t call spirits in. However, this is a good place to highlight another special addition to Elden Ring, something that folks that have complained about “boss runs” in other FromSoftware titles will adore, the Stake of Marika. If you die within range of a Stake of Marika (which are placed close to bosses that don’t have sites of grace around) you can simply respawn and try the boss again almost instantly with no run back. Keep the blood pumping as you go from attempt to attempt without worrying about getting annoyed by trash monsters! When the Bloodhound Knight is bested, I obtain an Ash of War: Barricade Shield. That’s right, Ashes of War can be for defensive armaments too, not just weapons!

Approaching Castle Stormveil
Exploring into some nooks and crannies on the corner of the explorable map, I find a spirit summon for Spirit Jellyfish and some more smithing shards. Now, it’s finally time to actually go in the direction the game has been pointing me to since I met Melina for the first time. If I was actually able to keep exploring in the other directions, like I ostensibly will be in the full title, I probably wouldn’t even head to Stormveil now at all. There are too many other things in the distance to explore!
The approach is perilous, and the intended takeaway here is clearly a lesson that Torrent can get you past some dire defensive enclaves speedily and without combat. However, I wanted to see if killing one of the massive trolls would cause them to despawn or drop some cool loot. After a few battles, I was able to pull the troll to a better area to fight them without so much archer coverage, and noticed that I could really mess them up by having them bump into walls and daze themselves. Sadly, they do respawn, but hey, they can probably be farmed for something useful. After besting the troll a few times, I saddle up on Torrent and zip up the approach to Castle Stormveil. Inside is a corridor with a checkpoint that clearly leads to a boss. It’s the first big boss of the network test, Margit the Fell Omen. Margit appears to have some kind of dragon blood running through him, perhaps “grafted” with gifts like the leader of the castle. If you go right to him from the beginning of the game, he’s a pretty challenging boss, but with the tools acquired from the various mini-dungeons and a few levels, besting Margit is much more achievable. If you are completely stuck, his significant weakness comes when he locks onto you for an aerial dive; there’s a fantastic opening to get some hits in after he lands. Still having trouble? Use a spirit summon, and Margit will divide his attention, allowing you to focus fire him down quickly.
Margit’s demise opens up several areas of the castle. The player can go through the heavily guarded main gate or take a side path opening that goes up the castle walls into a less-guarded section. In the network test, you can’t get past either section to head further into the castle, but there’s lots to find in each area nonetheless. The direct route takes you into the line of fire of many ballista bolts and dangerous soldiers, but a seasoned “Souls roller” should have no trouble reaching the end, where a blocked door bars any progression forward. To the side of this direct area is a mysterious alcove with a bunch of kneeling soldier statues, guarded by a giant lion that has swords attached to its arms for what I assume is additional lethality. Combined with birds that have scissor-blade talons, these two odd animal assailants give more in-universe lore to the “grafting” process that seems to be going on at Castle Stormveil, mixing… well, all kinds of things that probably shouldn’t go together. The lion appears to be a kind of failed experiment or a work in progress, with its ensemble wrapped up clumsily with chains. That said, be careful with that thing, it’s really dangerous.
I spent a significant amount of time in the soldier statue room, playing with the time of day, attempting to unseat the statues from their locked positions, and targeting the obvious fake door wall with every emote in my possession. I even let the sun’s position overhead encapsulate the area with the door, hoping something magical would happen. Sadly, if there was any secret to unearth in the statue room, I didn’t find it.
The “easier” route takes the player through an experience many a souls player has had before, with rickety stairways inhabited by bomb-throwing humanoids that lob them at you as you navigate platforms full of exploding barrels. The highlight is a pitch black room with a huge mini-boss creature in it, vaguely reminiscent of the Prisoner Horde monster in Demon’s Souls. There’s one object in the room lit up, begging the player to take it, which of course, shuts the door and makes the monster very angry. That’s fine because you need to kill the creature to collect the Rusty Key to proceed. Sadly, the door opened with the Rusty Key leading to a small room with a ladder that reads “More awaits you, in the official release.” That’s too bad. I wanted to take on Godrick the Golden, but he’ll have to wait for another time.
The Flying Dragon Agheel And The Church of Dragon Communion
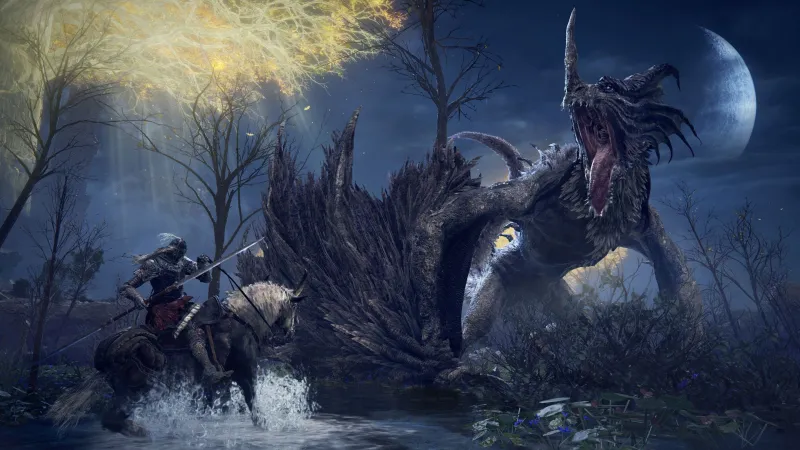
Back near where we started our adventure lies a lake. Exploring it early is common, but if you don’t approach a particular island, you’d never know there’s a major dragon boss available in the network test as well. One of the islands in the lake has around four lesser humanoid enemies milling about a bonfire. Approach it, and Flying Dragon Agheel comes down from above for some serious action. If you die, Agheel will remain in the lake and wait for you to come back for another round (or ten). There’s a Stake of Marika nearby so that you can practice at leisure. A summoned spirit will help here, but this is a fight where learning how to use Torrent to your advantage can be an amazing boon. While battling on Torrent may initially feel very awkward, it’s a massive speed boost here that puts you almost on even ground with the flying monstrosity, letting you dodge fire and keep up as it flies around the enormous arena. Other enemies may aggro you during the fight, but ignore them – Agheel’s flame will clean them up and give you free runes. In fact, a combination of mounted combat and classic maneuvers might be the right choice here, depending on your playstyle and archetype. Agheel’s moveset will feel very familiar to Souls players (He’s kind of like a baby Midir), as will the difficulty in landing melee blows on his ever-swaying head. Agheel has dangerous abilities to use whether you’re behind, underneath, or in front, so practicing a bit is to your great advantage. After you finally fell the blistering beast, you obtain the Dragon Heart. Now you may be asking, what on earth do we do with a Dragon Heart?
The answer lies on an island that seems impossible to get to via normal means. If you try to walk there or ride Torrent there, you’ll get a swift trip to the “You Died” screen. No, the answer lies to the south, following the beach down to an innocuous cave. The cave contains nothing of much value and a boss fight with two different enemies to dispatch, but it shouldn’t be any problem for someone who has killed Agheel. Upon beating the boss, you’ll notice that this cave has another exit behind the boss, one that leads up right to the forbidden island. You’ll find the Church of Dragon Communion on this island, where you can turn in the Dragon Heart. I obtained Greyoll’s Roar from my heart, a Faith spell that requires 15 faith to use that “Sounds the roar of Great Ancient Dragon Greyoll.” I bet it’s a pretty sweet spell, but I didn’t have 15 points in Faith, so it simply took up a spot in my inventory.
These highlights tell some of the major beats, but there is mystery everywhere in the Elden Ring network test, and I hope that you get to explore it. Elden Ring does indeed draw upon many of the elements that make the Souls series some of the best games in the world, and Souls veterans will be right at home. New players to FromSoftware’s suite of exceptional action-RPG fare will find a helping hand in both summoned spirits while playing alone and a host of multiplayer functions that allow for jolly cooperation. Both sets of players will find themselves enthralled by the exploration elements combined with the already tried-and-true, best-in-class art direction, dungeon design, and fluid combat. Elden Ring may still be months away, but now the wait’s going to feel exceptionally long. It might even be better than Bloodborne. See you in February, adventurers.
[ad_2]