Animate a Camera Fly-through on Scroll Using Theatre.js and React Three Fiber
[ad_1]
From our sponsor:
![]()
![]() Target your best customers and see up to 88% more revenue with Predictive Segments. Sign up today.
Target your best customers and see up to 88% more revenue with Predictive Segments. Sign up today.
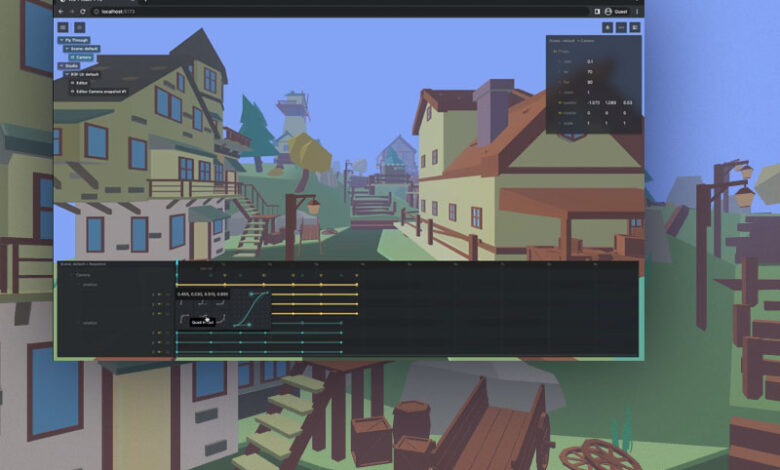
This tutorial will show you how to display a 3D scene on your webpage, and fly a camera through it as the user scrolls, in 50 lines of code. We are going to use Theatre.js, React Three Fiber, Drei (React Three Fiber’s utility library), and Vite as our bundler.
Contents
Prerequisites
To start, scaffold a new React project using Vite by running
yarn create viteand selecting the React template.
Delete all the files from the /src directory so we start with a blank slate. Now we can get to implementing our app.
Let’s start by adding all the dependencies we will use. We are going to be using 6 closely related libraries:
- Three.js: a JavaScript library used to create and display animated 3D computer graphics in a web browser using WebGL. It includes functions for creating 3D geometry, camera controls, lighting, texture mapping, animations and more. It can be used to create interactive 3D experiences and games, as well as create 3D data visualizations.
- React Three Fiber: a React renderer for Three.js, providing an intuitive declarative approach to 3D scenes and components. React Three Fiber makes it easy to work with Three.js, allowing developers to create 3D experiences while benefiting from the component-driven structure and state management of React.
- Drei: a React Three Fiber library of useful components and hooks. It includes components for loading Three.js objects and textures, camera controls, lights, animation, and more. It allows developers to quickly create 3D experiences without having to manually create and wire up the Three.js components.
- Theatre.js: an animation library with a professional motion design toolset. It helps you create any animation, from cinematic scenes in THREE.js, to delightful UI interactions.
@theatre/coreis the core animation library,@theatre/studiois the development-time animation studio we’ll use to create Theatre.js animations, and@theatre/r3fis a Theatre.js extension providing deep integration with React Three Fiber.
# three.js, r3f, drei
yarn add three @react-three/fiber @react-three/drei

# theatre.js
yarn add @theatre/core @theatre/studio @theatre/r3f
Then download environment.glb and place it in the /public folder. This file contains the 3D scene we are going to fly through with the camera. You can of course use any other GLTF file for your scene.
Connecting all the pieces
With all the dependencies installed, create 3 files in /src
main.jsx– High level setup code for React and Theatre.jsApp.jsx– Our application codemain.css– A bit of CSS to position our canvas properly
main.jsx is going to look a lot like what Vite creates by default:
import studio from "@theatre/studio";
import extension from "@theatre/r3f/dist/extension";
import React, { Suspense } from "react";
import ReactDOM from "react-dom/client";
import App from "./App";
import "./main.css";

studio.extend(extension);
studio.initialize();

ReactDOM.createRoot(document.getElementById("root")).render(
  <React.StrictMode>
    <Suspense fallback={null}>
      <App />
    </Suspense>
  </React.StrictMode>
);
The only 2 differences are
- We set up React Suspense on line 13 so we can load our 3D models.
- We set up Theatre.js Studio on lines 8-9 by first extending it with the r3f extension, and then calling
initialize().
We are going to use main.css to fill the screen with the canvas we’ll create in the next step using React Three Fiber:
html,
body,
#root {
  padding: 0;
  margin: 0;
  width: 100%;
  height: 100%;
  overflow: hidden;
}

body {
  display: flex;
  align-items: center;
  align-content: center;
}
Next, let’s populate App.jsx with our application code:
import { Canvas, useFrame } from "@react-three/fiber";
import { Gltf, ScrollControls, useScroll } from "@react-three/drei";
import { getProject, val } from "@theatre/core";

import {
  SheetProvider,
  PerspectiveCamera,
  useCurrentSheet,
} from "@theatre/r3f";

export default function App() {
  const sheet = getProject("Fly Through").sheet("Scene");

  return (
    <Canvas gl={{ preserveDrawingBuffer: true }}>
      <ScrollControls pages={5}>
        <SheetProvider sheet={sheet}>
          <Scene />
        </SheetProvider>
      </ScrollControls>
    </Canvas>
  );
}

function Scene() {
  const sheet = useCurrentSheet();
  const scroll = useScroll();

  // our callback will run on every animation frame
  useFrame(() => {
    // the length of our sequence
    const sequenceLength = val(sheet.sequence.pointer.length);
    // update the "position" of the playhead in the sequence, as a fraction of its whole length
    sheet.sequence.position = scroll.offset * sequenceLength;
  });

  const bgColor = "#84a4f4";

  return (
    <>
      <color attach="background" args={[bgColor]} />
      <fog attach="fog" color={bgColor} near={-4} far={10} />
      <ambientLight intensity={0.5} />
      <directionalLight position={[-5, 5, -5]} intensity={1.5} />
      <Gltf src="/environment.glb" castShadow receiveShadow />
      <PerspectiveCamera
        theatreKey="Camera"
        makeDefault
        position={[0, 0, 0]}
        fov={90}
        near={0.1}
        far={70}
      />
    </>
  );
}
Let’s unpack what is happening here.
In the App component (lines 11-23), we set up all the dependencies for our Scene component:
getProject("Fly Through").sheet("Scene”)retrieves our animation sheet. Sheets are containers for animatable objects. We are going to make this sheet available to Theatre.js’ r3f extension throughSheetProvider, which will automatically use it, so we don’t have to worry about its specifics here.- The
Canvascomponent from r3f creates WebGL canvas element that stretches to its parent element (thebodyelement that we sized to fill the entire screen in the previous step), and sets up a render loop. We will hook into this render loop later using theuseFramehook. - The
ScrollControlscomponent from Drei sets up the invisible scroll container we are going to use to bind the scroll position to the animation playback without actually scrolling any visible HTML element.
In the Scene component (lines 25-56):
- We use
useCurrentSheet(),useScroll()anduseFrame()to update our animation position with the up-to-date scroll position on every frame. - We set up a Three.js scene:
- We create a sky-like ambiance using the
colorandfogobjects (lines 41-42). - We create some lights (lines 43-44).
- We display our GLTF model we previously placed in the
publicfolder (line 45). - We create our camera using
PerspectiveCamera, which we will animate using Theatre.js. This component is imported from the@theatre/r3flibrary, which makes Theatre.js Studio automatically pick up on it, without any setup. While we specify some defaults here, all of them can be modified or animated in the Studio UI.
- We create a sky-like ambiance using the
If everything is correctly in its place, after completing all these steps, you should see this when running yarn dev:

Not much to look at, but we’ll change this soon.
Creating the animation
Open the snapshot editor by clicking on the snapshot button in the toolbar:

With the Snapshot editor open, select the Camera object and move it to the start of the scene.
With the Camera selected, right-click on the position property in the panel on the right-hand side, and select Sequence all.

The sequence editor will appear:

Place your first keyframe by clicking on the keyframe icon next to the position property on the details panel:

Then scroll a little bit down. Notice that the playhead indicator moved ahead in the sequence editor:
Note, normally, you can drag the playhead on the timeline, however here, since we bound the playhead position to the scroll position, this is not possible. You can temporarily restore this functionality by commenting out the useFrame hook on lines 30-33 in App.jsx.
Now move the camera a bit in the snapshot editor. Notice that a new set of keyframes was created for you. If you now try to scroll up and down, the camera will move with it.
Repeating these steps, try moving the camera to the other end of the scene. Similarly, you can also create keyframes for the rotation of the camera to make it look around.
When you are done, you might notice that the movement of the camera is a little jittery. This is because the default easing eases the movement in and out between every keyframe. To get a smooth movement across the entire path of the camera, we need to set the interpolations to linear. To do this, select all the position keyframes by holding down Shift, and dragging the selection box over the keyframes. When all of them are selected, click on any of the connecting lines, and select the linear option.
To check what our page looks like without the Studio, you can press Alt/Option + \ to hide it. Alternatively, you can comment out studio.initialize().
When done with animating, your finished scene might look something like this when you start scrolling:
Getting ready for production
So far, all the keyframes you created are saved in your browser’s localStorage so your animation will be remembered between page refreshes.
To distribute your animation as a part of your website, export your Theatre.js Project by clicking on “Fly Through” in the outline menu in the top left of the UI, and then click the “Export Fly Through to JSON” button on the right.
This will download a JSON file. We can move this file to our src directory and import it.
import flyThrougState from "./state.json"
To use it, all we need to do is replace the following line (line 12):
const sheet = getProject("Fly Through").sheet("Scene");
With the following:
const sheet = getProject("Fly Through", {state: flyThroughState}).sheet("Scene");
We are now passing the saved animation state to getProject. By doing this, The Theatre.js Project will be initialized with the saved animation from state.json instead of with the animation saved in localStorage. Don’t worry; any changes you make to your animation in Studio will still be saved to localStorage after you do this (your edits will still survive page refreshes).
Deploying to production
When we are done and ready to deploy our webpage to production, we only need to do two things.
- Make sure that we have the latest project state exported to a JSON file and passed to getProject.
- Remove studio.initialize and studio.extend (lines 8-9 in
main.jsx).
Tips for further exploration
The editable utility
Import the editable export from @theatre/r3f.
import { editable as e } from "@theatre/r3f"
Afterwards, if you want to make other threejs objects editable in the snapshot editor, like the lights or the fog, just prefix them with e., and add the theatreKey="your name here" prop:
<color attach="background" args={[bgColor]} />
<e.fog theatreKey="Fog" attach="fog" color={bgColor} near={-4} far={10} />
<ambientLight intensity={0.5} />
<e.directionalLight theatreKey="Sun" position={[-5, 5, -5]} intensity={1.5} />
<Gltf src="/environment.glb" castShadow receiveShadow />
<PerspectiveCamera
  theatreKey="Camera"
  makeDefault
  position={[0, 0, 0]}
  fov={90}
  near={0.1}
  far={70}
/>
Afterwards, you can freely adjust, or even animate their properties in the editor, just like we did with the camera.
Theatre’s custom Three.js cameras
@theatre/r3f’s PerspectiveCamera and OrthogramphicCamera have identical API to those exported by @react-three/drei, with one extra goodie: you can pass a Vector3, or any Three.js object ref to the lookAt prop to make the camera focused on it. You can use it to make working with the camera easier, like this:
<PerspectiveCamera
  lookAt={cameraTargetRef}
  theatreKey="Camera"
  makeDefault
/>
<e.mesh theatreKey="Camera Target" visible="editor" ref={cameraTargetRef}>
  <octahedronBufferGeometry args={[0.1, 0]} />
  <meshPhongMaterial color="yellow" />
</e.mesh>
[ad_2]


